Saturday, May 31, 2014

Pardon the Interruption

We will now be returning to our regularly scheduled DIY's. School kind of took over my life in a major way (#hardmajorprobs, amirite?), but since summer break began I have been crafting a little each week. Here are some of the small projects I have done:
my uneven handwriting is the bane of my existence.
Bada-bing! Two crafts in one! This July I am going back to the most BEAUTIFUL place on earth, Armenia, Colombia. On the left, inside a cute Washi tape frame (seriously, it's just tape) is the outline of Colombia. Happiness. On the right is a quote that I feel has come to reflect my life over these past few years. I am so blessed that I have been able to travel to share the gospel of Christ around the world and leave little pieces of my heart with everyone I have met.
TOMS flag crafts are so hipster it hurts


This shelf is ultimately still my favorite craft of all time, because I got to use a power saw. TOMS flag in a frame: I have about five of these laying around because I'm obsessed with TOMS. Aforementioned flag previously was taped into the inside of my closet door until I found a cheap, glassless frame in our attic and I decided to see if I could make it fit... and it did. I like that the fabric of the flag contrasts with the wooden frame! Other shelf items: W, painted by yours truly at the very cute and creative Artsy Me studio; glitter Georgiafake flowers in a vase; paint chips collected while choosing the color for my shelf - very close to colors in my bedspread; and the quote "When you have bad days, remember why you're doing that thing you love. Remember why it's worth it."

thou shalt not judge all my GA outlines
And last but certainly not least, one of my cuter crafts (in my personal opinion): an outline of sweet, sweet Georgia next to the words of our unofficial (or possibly our actual) state theme song. I love to travel, but nothing is quite like being home. Usually this song gets stuck in my head during our return flights.

I hope that this summer I will be posting many more DIY projects (there are some big ones on my list!). After finding super cute easy application wallpaper today at target (SUPER EXCITED ABOUT THIS!), I am full of ideas! Keep me posted about your own crafts or things you would like to see me do! Enjoy the summer weather!


-nicole

Tuesday, February 18, 2014

Peach Pride


Today I'm going to talk about one of my all time favorite crafts: the glitter state! I know, more glitter. But seriously, it's adorable. After having become a sort of traveler, there really is no place quite like home. For me, Georgia is one of the greatest places on the planet. So I decided to proclaim that to the world... through crafting. Naturally.
the greatest of all 50. i swear.
All you need:

  • Modpodge (again, use a container and paper towel to catch any mess!)
  • Glitter (again, doesn't matter whether you use chunky or fine. you can also mix two colors if you choose to do school colors, etc.)
  • Paintbrush and scissors
  • Outline of your state (Google state outlines, they are generally pretty simple to find. The trick is finding one that is not too large or too small for whatever size frame you have.)
  • Construction paper (2 sheets) - I would not recommend using printer paper or an equally light paper as the glue and glitter will probably be too strong for it to hold up well. 
  • Frame of choice (I had this little beauty hiding in my attic, thanks for never throwing anything away mom!)


Take the state outline you have printed out and cut as close as you possibly can to edge of your state. Georgia has lots of random little squiggles on the border and I wanted to make sure I kept them (artistic integrity and all. is that a thing? I don't know). Next, you will want to trace your state outline that you just cut onto a sheet of construction paper - this will be what you are actually gluing and glittering - and then you will cut that outline out. (I know this doesn't seem fun so far, lots of cutting and tracing.. bear with me through the boring.) Now that you have your state outline on construction paper, lay that bad boy in your plastic container and slap some modpodge on it. Again, you do not need a thick layer! Next, cover your state with glitter. Mix and match colors - have fun with it! Allow it to sit for two minutes and shake your excess glitter off. (Don't pick it up!! Shake your container a little bit. You don't want to mess up the glue.) Tip: while your state is still inside your plastic container, spray it down with a good layer of hairspray. This will prevent the glue from flaking off inside of your frame. Now that you have gotten rid of the excess glitter, you can modpodge your state to your second piece of construction paper. This will serve as your backing. (Make sure that you do any cutting necessary to fit this sheet to your frame before you modpodge your state to your backing.) Slip it into your frame and set it somewhere everyone can see your awesome state pride!

Have fun crafting!
-nicole

Sunday, February 16, 2014

All You Need Is... Glitter

I love keys. I have mementos from one of my favorite places in the world on my keyring (¡viva Colombia!) as well as my mace (you can never be too safe, amirite?). I have several keys, and usually if I'm in a hurry I can never remember which one goes with what. So I decided that I needed to make at least one of them a little decorative... and I went straight for my glitter. I'm telling you people, glitter is God's gift to crafting.


ModPodge-God's other gift to crafters
All you need:

  • glitter color of choice (doesn't matter whether it is chunky or fine, I just had chunky on hand)
  • ModPodge (I have tried it with Elmer's glue.. it holds for awhile, then flakes off and is annoying. I call this a craft fail. If you don't own modpodge, invest in it. It lasts forever and you will love your life.)
  • A key (duh)
  • Paintbrush (doesn't matter which size, I have used two different sizes. I will say that the one with a smaller brush head was more effective)
          •  Small container to place your key in
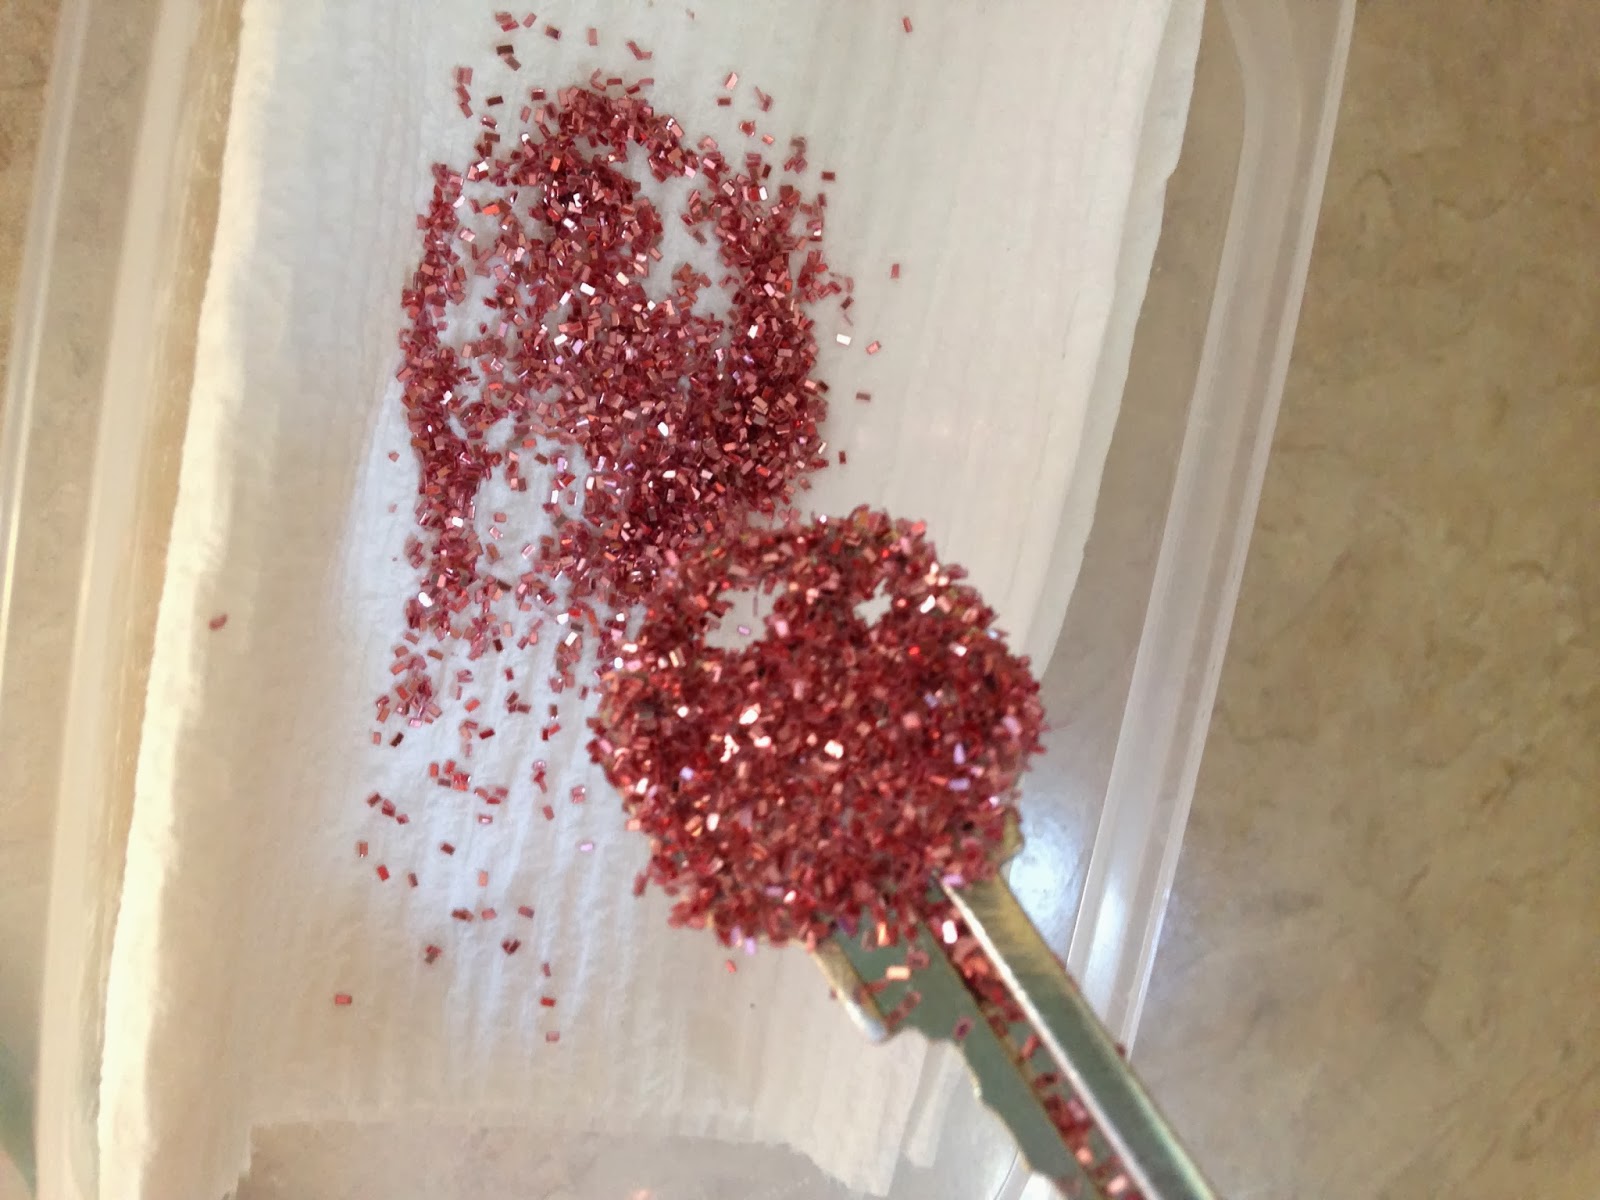
Wash your key off (no soap necessary, just make sure there is no oil/grease from your fingers). I recommend using a paper towel, you can fold it up and put it underneath your key in your container to catch any glue or glitter. (Mess reducer, yes and amen) At this point you want to start painting on your ModPodge.
smothered and covered
thin layer only!
It doesn't need to be a thick layer, modpodge is very effective and will hold your glitter.
Next, you can just sprinkle glitter on the key! Completely cover that sucker.

Tap your key on the side of your container to shake off the excess and boom!

Now you have a brand new sparkly key! I would advise you to let it sit for at least thirty minutes to dry completely. (Tip: once your key is dry-and I mean totally, has set for at least thirty minutes to an hour dry-you can coat it with another thin layer of modpodge to seal it.) Slide it on your keyring and flash it around! Enjoy!

-nicole

Prettiest Chargers Around

Today I'm going to talk about updating your iPhone (or any phone) chargers and adding a little personal flair to them! I am always paranoid about getting my charger mixed up with the four thousand other white iPhone chargers on youth trips. So I decided that I would make mine stand out a tiny bit.
Knockoff Jo-Ann's Washi Tape
Who doesn't like flower patterns?
How fun, right? Literally all you need is tape and your charger! I spent MAYBE ten minutes doing this (I'm kind of OCD, so all my flowers needed to line up..), and ended up with super unique and fun chargers for my phone and Kindle. You can find your tape anywhere craft supplies are sold - I got knockoff Washi tape (it's so popular, most stores sell their own brands). If you aren't at a craft store like Hobby Lobby, JoAnn's or Michaels, look on the scrapbooking/craft aisle. 
All you need to do:
  • find your charger from wherever you last plugged it in to keep your phone alive
  • grab your fancy tape
  • wrap it around your charger (if you want to layer two different styles, wrap the tape halfway around the charger, then cut it as close to the edge of the charger as possible. repeat this for the other half of the charger - it's much easier than wrapping the tape all the way around then trying to cut it.)
  • Show off to your friends
Seriously, it's that easy! Go wild!

-Nicole

Saturday, February 15, 2014

A New Adventure

The past few years have held a lot of change for me.
 I changed..

  • my major
  • the way I thought about myself
  • the way I see the world
  • what I think I can accomplish
This blog is part of a tiny piece of that change. I have always been able to create stories, but I never thought that I could create things. Then came Pinterest. Now, crafting and making things is one of the most fun things I do regularly. I love a challenge, and some crafts are more challenging than others (try making 15+ mason jar soap pumps), but they are usually a blast.

That being said.. I really want to dedicate this blog to crafting and enjoying life. I will post pictures of my crafts and step-by-step instructions so that you can make them too! Beware.. I don't measure anything. I pretty much like to "wing it." I'm sure any and every craft can be found on Pinterest, and I will try to reference my original sources when I can! I would love if you all suggested crafts you have tried or crafts you would like to see me try!

So excited! See y'all on the flipside!
-Nicole